Sunday 26 May 2013

Texturing Studio Character

Found some time for texturing out my prisoner character today in between renders for my animation clip. Really liking the personality that Ive created for this character. He is a prisoner who has been locked up for a very very long time and he lost his marbles completely

I know there is a crit coming up however I dont think its going to be possible to get this guy rigged and animated before that time. Although I think I have shown off my rigging skills from previous posts in my short film. I still need to retopologize the model as well. These tasks are both EXTREMELY time intensive. Ill see what I can get done before the 28th.


Thursday 23 May 2013

Wall Finally To A Suitable Standard

Ive been working for 2 days now trying to fix the wierd bump artifacting on the wall in shot 5 and I have finally found a work-a-round. The reflection was screwing up the surface for some reason. To combat this i dropped the reflection and then raised the glossiness of the material.

Here's a quick shot of what the shot will look like zoomed out.


Wednesday 22 May 2013

Scene 5 Complete

Finnished scene 5, however I am getting this really wierd problem on the wall where there bumps all over the material. I dont know why its doing this. Ill try figure it out tomorrow.

Heres a small snapshot of what it will kinda look like.


Tuesday 21 May 2013

Glass Material testing for scene 5

Basically in this scene there are going to be clones staring out the window looking out at their new home. I am actually really excited to start animating this scene with all honesty. I want the camera angle to shoot from the outside of the spaceship because I want that feeling of isolation.


Scene 6 Complete

Made a a lot of progress today, I am thinking that MAYBE, just MAYBE I might get this project in on time. There are just a few issues that I need to figure out with maya but apart from that I am fairly confident I have a knowledge to re create my vision for this animation. I am finding A LOT of minor problems that are wasting precious time, so when ever I meet a problem I cant overcome I usually make a post on a forum and move onto something less complicated. By doing this there is no downtime in between working on different aspects of the short film. By the time I finish a task chances are there is  reply to my question and I can then move forward again.

Here's a screenshot of what scene 6 will look like. Once again, I am very pleased with the result:


Finalizing Scene 2

Doing a little bit of compositing within maya to imbed a background into the shot. I felt I needed to do this to bring more noise to the shot. It just looked a little too plain before.

Here's the result:


Monday 20 May 2013

Animation Complete

For this scene I have incorporated a slow-mo look to it as the camera pans around the room. This was a great idea because it meant less work needed to be done on the animation. All I had to do was make slight movements and drag the frames over a lenth of 250 frames. This created a very nice effect. Ive made a basic video here of some shots. Obviously it needs to be cut and edited for the final result but you get the picture at least.

Render of the Scene

To finnish off my working day at 5am I wanted to upload a picture that brought a smile to my face. This is what the overall scene will look like, as you can see with the poses I have used, the emotion of the scene is really captured. This is the point where the humans have discovered a new inhabitable planet. I wanted them to show shock, awe and excitement.

I am extremely happy with the final result:


Scene1 Shot setup

Ok reached my goal for the night and its only 4am! Quite tired now I must admit but nothing some coffee cant fix. So far I have managed to set up the scene with all the clone characters with a specific pose within the environment. I have decided against heavy animating because its too time consuming and I need to focus on other things. The best way around this is to create a time warp of the camera zipping around as everything happens in slow motion. I can add simplistic movements and drag them over a timeline of 250 frames and it will look like the matrix. I really want a few closeups of the characters main features as well. Like a close up of a slow blink, lips twitching and opening, and also fingers extending. These small details will really make the shot look nice.

Heres a quick click of ONE of the camera revolves.:


Rig Complete

Once again, my inner OCD perfectionist is screaming at me, but I must push on ignoring that voice in my head. I have slapped together a VERY basic body rig of the torso just so I can quickly animate some key poses for the shot. Since there wont be much movement it wont affect the overall quality too much.

Its going to be a very long night, as usual. Still waiting on an email back from Karin to find out what is going to be possible in the remaining few days before the due date. I REALLY need an extension for the render times of this project. Hopefully by the end of the night I will have this character duplicated and ready to be animated within scene 1...


Sunday 19 May 2013

Full Character Model Complete

Once, woke up and got straight back to work as per usual. I finished baking out displacement and normal maps for the clothing so that I could replicate the detail from zbrush into maya and add the clothing to the head rig. From here I simply need to add a few bones and IK handles and the rig will be ready to be referenced into the environment I made for scene 1.

I wanted it look like more of a lab coat in the end, and also the color white strongly relates back to the whole 'clone' theme that I was going for within the film. I kept it pretty minimal. I wanted to make it more detailed but I literally don't have time which really annoys me because I am pretty OCD when it comes to perfection.

You will notice that there are also a few artifacts under the armpits, around the rim of the collar  and the sleeve  I could fix these but once again. Not enough time.

Here is approximately what the final model will look like within scene 1:


Cant Sleep

For a few months now I've been working nonstop almost from the time I wake up to around 3 am in the morning and its really takings its toll on me now. Sleeping pattern is absolutely demented so what else can I do but more work? Perhaps something towards studio?

I suppose with the mood I'm in lately I had to express it somehow through CG. The pieces of puzzle (for the rig) just weren't fitting together as they should. And so I stepped back for a minute and decided to rearrange the puzzle. I imported the hand mesh into the scene and duplicate it numerous times around the rig. Using the facial rig I played around with expressions until I found one that suited the atmosphere - FEAR.

For some reason I imagined my character in a dark dungeon with giants all around him. I wanted to push the rig and try and get some exaggerated facial expressions to fit the mood of terror.

I guess this is the feeling I'm getting now knowing that I wont get my short film in on time. Despite nonstop learning and hard work it seems it will not pay off. The rendering alone is going to take a week and I haven't even put it all together yet... Perhaps I have bitten off more than a can chew for the time we have been allocated.

Here is what I came up with:


Hand Modelling

I have also sculpted the hand model which will be used for all the clones. It has been retopologized, textured and sculpted. All it needs now is to be placed onto the main rig with the clothing and head.

Using the same SSS shader I rendered the mesh in maya/Vray

Here is the final result:


Clothing Creation For Character

Learning from my mistakes prior I decided to create an animation friendly basemesh before proceeding to sculpt. I made sure the shoulder topology was correct for animation so I could simply bake out my maps without worrying about retopologising the sculpt. I made it very wrinkly to get across the look that the human clones were very bony and skinny.

Here is the final result:


Facial Rig Finally Complete

Ok so with time constraints I've had to cut the facial rig short and reduce a bit of the detail. But with all honesty I didn't really need it to be this robust. Because the shot will only be very short and in a dimly lit room. Most of the detail will not be noticed. Even so, this rig still provides a great performance. I've used many techniques such as blend shapes and curve deformers mainly to deform the face. This has by far been the most time consuming process involved in my short film animation. Time to put it to the test!


Saturday 18 May 2013

Studio Character Concept

Unrelated to my animation paper I have also somehow managed to find the time to concept out my character for my studio animation. I wanted to create a character with a lot of personality. And since the theme of the cartoon was medieval I figured the best way to do this was to use a prisoner. I wanted to portray a deranged prisoner who has been in the same cell his whole life and has a few screws loose. In fact, hes completely stark raving mad. I wanted him to look anemic and skinny from being mistreated  To do this I created a collage of images that I used as reference to inspire the look of the character. As disgusted as I was to look at images from the holocaust I still found them useful to generate ideas of anatomy for a person who has been abused and starved. I also found it very usefull to constantly refer back to the la luna cartoon imagery to make sure I was modelling the character to fit into with the other characters. I noticed from pictures that there is a lot of exaggeration in the cartoon and I used this fact to play a lot with the design. I extended the limbs and sucked in the belly to really get across the message that this character has been starved his whole life.

I still need to texture and retopologize for animation friendly geometry but these tasks are more time consuming rather than creative. My favorite -_-.

Here is what I came up with. (it is no where near finished detail wise but its pretty close, I still need to add features such as the hair, beard, wrinkles, and mud. He will look VERY unkempt I assure you.)


Scene 1 Complete

Ok so I spent the day modelling out the first scene. I wanted this to be a very details shot because it was in doors. However it did not have to be perfect because I plan to have many closeups of faces in the shot. This is because I want the audience to understand the desperation and emotion of the humans as they decide to pick this planet to travel to in search of resources and a new home to inhabit. I really wanted it to be gloomy and dimly lit by a hologram. Almost as if a torch was being held under the chins of the humans as they stand around the hologram examining it. I also used the same texture and illumination (red) in this scene to show that they are on earth. (this connection will be made by the ships that are flying away from the planet that are colored blue instead of red)

It gives a creepy feeling and with the combination of good animating, this shot will be great. I will also note that the blue orb will be replaced by a hologram of a planet in after effects in post. So it most likely will not be such a solid sphere of light.

Keep in mind that the room will not have a roof to save time. This was planned in advance during the storyboard because the whole shot will be of the upper torsos (face included of the humans standing around the hologram.) I am glad I worked this out earlier as it will greatly reduce the time it would take to model and UV.

Here is what I drafted out today.


Friday 17 May 2013

Scene 2 Complete

Adding further details to the ships and the planet. Instead of animating the earth displacement map I decided to just show the planet in its desolate state after humans have run out of resources. I will animate holographic text in the shot to introduce the planet as earth so as to not confuse the audience. I also added irradiance maps to the ships and planet to emphasize that the earth is in trouble and in a meltdown state due to lack of resources.

Eg

Earth
Population: 350,000
Resources: 0.5%
Status: Uninhabitable

Here are some sample pictures:


Thursday 16 May 2013

Scene 2 Blocking Out

Scene 2 is the scene where the ships leave planet in search of a new planet. I have simply duplicated my ship model multiple times and animated them flying away from the planet. In the scene I am playing with camera movements and also lighting as well.

All I need to do is add texture to the planet and also add a background with stars etc. Most of this can be done in post.


Playing Around With Facial Rigging

For my animation I will have many of these characters in the same room because the human race has long been void of any form of diversity. Instead humans are all clones. (convenient for someone who is lacking in time). I really want these characters to show emotion and sadness in losing their home planet. Because of this I need to produce a rig that is capable of delivering realistic emotion.

I have only completed half the RIG but here is some poses I have managed to produce using a simple joint structure in maya.


Wednesday 15 May 2013

3D modelling Statue

Here is a 3d model that I created to act as a statue in the Aotea Square. It is of an ancestral Maori man commencing a powhiri to welcome guests into the area.


Tuesday 14 May 2013

Asset Modelling For My Anmimation

Here is the spaceship I modeled using displacement maps. Instead of engineering displacement maps from models I reverse engineered them by creating them in Photoshop first and then applying them to the model.

How I did it was by using primitives and UVing each individual face. I then spead these UV'd faces out on a tiled displacement map to give the illusion of detail. In a sense I did the modelling in photoshop rather than in maya. I absolutely love this workflow and will deffinately be using it in future projects to reduce modeling and  sculpting work hours.

I will duplicate this ship many times in my animation to show the colonies of the earth leaving in search of new planets. The only problem I am facing at this time however is the background. I need to have a background that is as detailed as the ship or it will look out of place.

Here is the final result of the ship:


Further Subsurface Scattering study

For the head of the character in my animation I wanted a skin look and hence the SSS shader was perfect once again to achieve this result. As you have seen from previous posts I have retopologized my head for animation. Not only that but I baked out displacement, bump, and texture maps for the head. I have then attached this maps into the SSS shader and tweaked its settings to simulate a look that indicated blood underneath the skin. When light hits the skin it is reflected back by the fluids underneath the skin to bring a bit of color into shadows. Overall I am extremely happy with the outcome. The head is alsmost ready for facial rigging as soon as I combine the eye and the head together.

Here is the final result of the combination of maps and shaders applied to the face:


V-Ray EyeBall Study

Because I want to have a realistic animation for my final result I am finding it necessary to delve deeper into the mysterious and continually expanding world of maya. It seems as though with every new thing I learn there are 100 other things that I must also know before the task is complete. After much strife I have finally come up with a workflow for realistic eyeballs. The most important thing I had to take into account was the anatomy of the eyeball. I had to consider things such as the cornea, iris, and sclera. I modeled these out using simple primitives from maya starting with spheres and then textured the sphere in Zbrush to add in the veins and iris. I took this into photoshop to create a bump map for added detail. Using the Subsurface scattering shader in Vray I tweaked the settings to give the illusion that blood flows underneath the eyeball. It also produced some very nice shadows. For the sclera I used a simple Vray material and changed the reflectivity and refraction settings to give it a see-through look with a shine.

Here is my result:


Thursday 9 May 2013

Changing the topology for animation.

Here I have used 3d coat to re create the topology so that I can animate facial expressions. I have done it so that I the polygons run loops around the face in order to replicate real life muscle directions. By doing this it will bring about more convincing expressions, and in animation this means everything. This by far is the most time consuming process of animating this character. It took a few days to fully complete this topology for the model. Its almost like doing a jigsaw puzzle except you have to choose how to fit the pieces together


Tuesday 7 May 2013

Space Animation Character Bust

Here is the character with the hat and the cloak stripped away. I intend to model all new clothing for the model. I want the model to like very cult-like inside the spaceship. All the humans on the ship are clones so I intend to duplicate the model using references in maya for my animation. I want to portray the human race as fragile and ancient. And this model fits it perfectly. All i need to do is retopologize and rig the character and its ready for animation.


More sculpting

Here is a concept sculpt I made in my spare time, using techniques learnt from my previous sculpts. I think that developing the face before anything else on the body is a great workflow because it is the main feature that determines the attitude and personality more than anything. The rest of the body can follow if the face is suitable for the idea in my head. Once again I focused mainly on the WORLD that this character existed in when sculpting as it enabled me to visualize the mood far better. Another positive feature of sculpting the head first is because the character will be covered in clothes and there is no need to sculpt the body as this will ultimately be covered up. This is a workflow that I will definitely be using more in detailed sculpts. This was a project for studio however I really want to include this in some kind of animation, possible for a short story and include the character in my animation paper. I know this is frowned upon but why not re use some assets. Time is a major factor in all CG productions and by doing this I will be able to cut weeks off. 


Monday 6 May 2013

Animation Post (late I know)

Ok, so ive been bashing away at a few projects in the recent months and they have gone wonderfully. My reason as to why this is my first animation post because I wanted to wait for my skill and idea to increase to a point where I could produce something id consider to be acceptable.

The first Idea I had was to create some kind of board game recreation of a battlefield that had come to life. Where toy soldiers were fighting each other from different countries to represent conflict between eachother and how human kind was slowly killing itself through war, pollution etc. I imagined God looking down on the earth in disgust and drops a bomb down from the sky on earth, obliterating human kind. The earth would look charred and burnt but still, a single plant rises from the ashes. I don't know why but this idea is very suiting to the theme of creating the creator. The creator destroys the creators of the creator, who starts the world over. I could go on haha. As much as I love this idea and would love to produce it but I literally have just realized I have 6 weeks to create something amazing on top of studio and my other elective. So I am SLIGHTLY changing my plans.

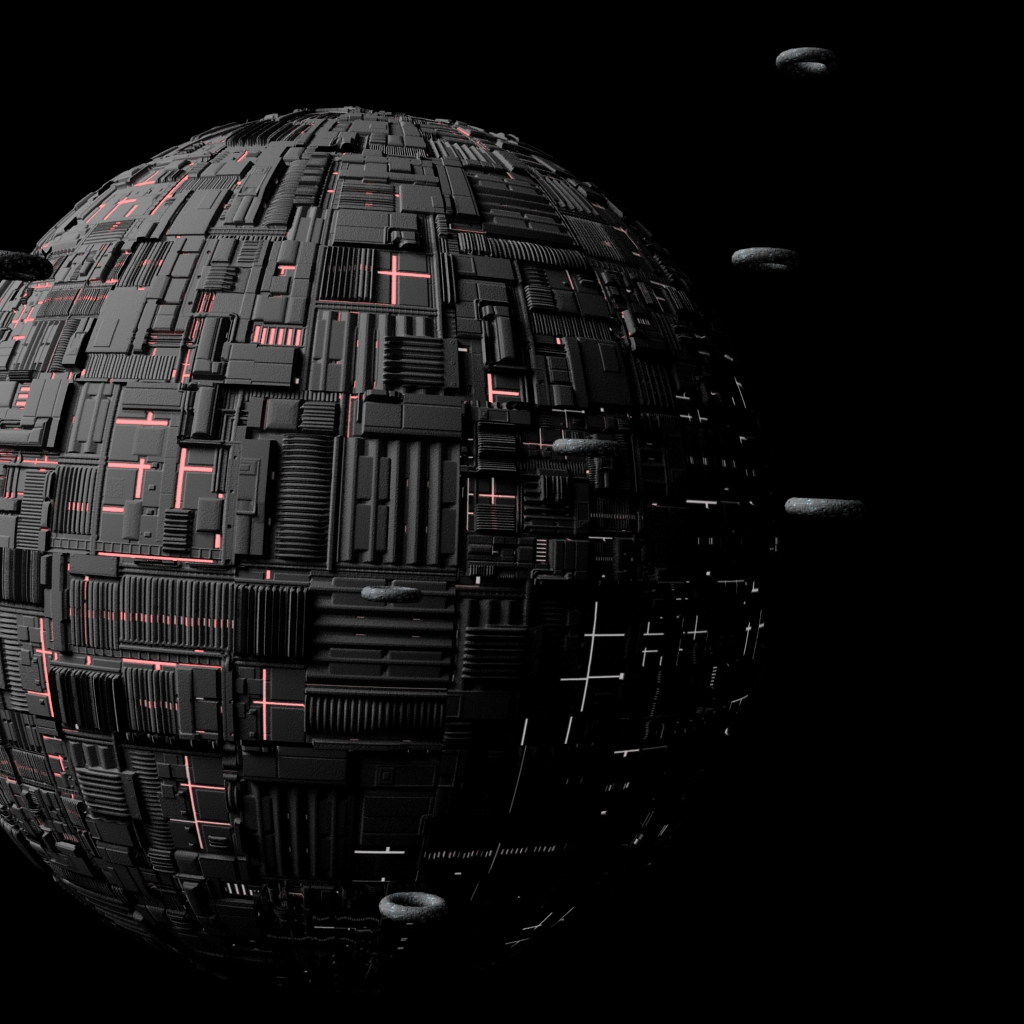
After a conversation with TJ I had an epiphany. I would EXPAND the field of play from a planet to the universe. TJ was discussing his idea of a game based in space and it reminded me of just how much I love space. It has actually been my dream to make a film of ANY kind based in space. Watching every space doco ever made in the past 10 years will do that to you. Something about it just strikes me as eerie and mystical. I think those could bring a huge flare to my project and change it for the better while at the same time reducing the amount of work needed because in space most objects are very easily modeled such as planets, suns and space ships, however I will probably want to add a lot of extra detail.

For this idea, in my head I imagine hundreds of human space ships. Blasting away from earth in all directions in search of a new home planet because earth has died due to abuse from humans. They all find different home planet to inhabit however every single planet seems to get destroyed by the human race in its future. Humans spread like a bacteria all over the universe destroying everything they touch. I love this idea because the universe created us and yet we are destroying our creator slowly. Its like we are a plague to the universe. Its all dark and dreery I know. But I love it the whole idea and symbolism behind everything.

Now its time to create some story boards...


Wednesday 1 May 2013

Storyboard

These pictures are not in order but here are the original sketches I started the project off. I already had what I wanted in my head at this stage these were just simple reminders.